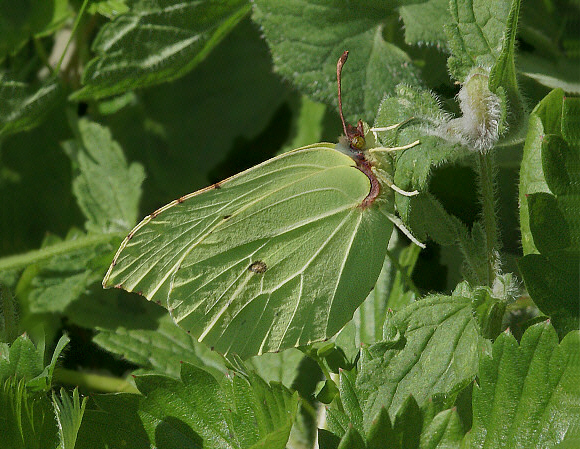
Gonepteryx rhamni, Overhead midday sun enhances the textures – Adrian Hoskins
General considerations
Before delving into daylight-shooting techniques, let’s first look at a few general considerations:
If you are new to butterfly photography it’s tempting to fit your camera with a fairly long zoom lens, and to take your pictures from a distance. The problem with this approach is that it’s difficult to hold the camera steady. You can minimise the effects of camera-shake by using a fast shutter speed but that necessitates using a high ISO setting. The latter unfortunately results in high levels of image ‘noise’ – distracting multi-coloured specks that show up in shadowy areas if you make large prints.
There are of course occasions when you have no choice but to shoot from a distance, e.g. when a butterfly is high up in a tree. It makes sense therefore to carry a long lens in your camera bag, but for 90% of the time you are better off using a shorter lens. A camera fitted with a 60mm or 70mm macro lens will be more manoeuvrable and lighter. It will also have a wider maximum aperture, resulting in a brighter viewfinder. OK, you have to get closer to the butterfly, but if you wear dark clothes, approach carefully, and avoid casting your shadow on it you’ll be fine.
Shutter speeds and apertures
The easy option is to set Program mode and let the camera take care of all the settings, but most experienced photographers prefer to have more control. When shooting images for the website, I set the camera to 200 or 400 ISO, and Shutter Priority mode, usually with the shutter speed set to 1/250 or 1/500 sec. The camera then sets an appropriate aperture for the lighting conditions – typically between F8 – F11. All lenses, including macro lenses are optimised to produce the sharpest results in the F5.6 to F11 range. Stopping down beyond F16 increases depth of field but at the same time it decreases optical quality.
Metering and bracketing
Digital cameras have sophisticated light metering systems that compare the scene in the viewfinder with an on-board database representing 1000’s of different scenes. Using advanced algorithms they calculate the exposure needed, and set a suitable shutter speed / aperture combination. Thus with ‘average’ subjects a DSLR will usually deliver a fairly accurate exposure.
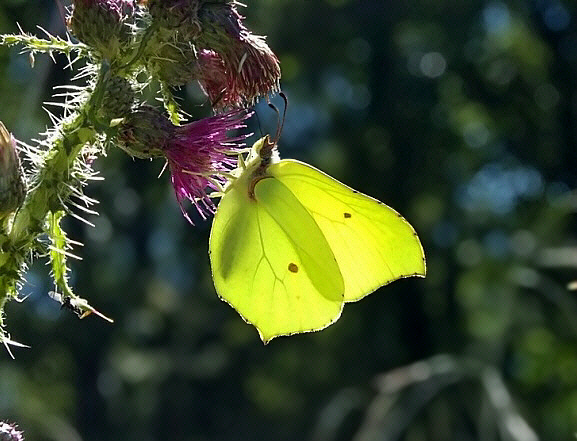
Butterflies however are far from being average subjects – they range from very dark, almost black Ringlets, to dazzlingly reflective Whites and Morphos. Furthermore butterflies often settle on bare ground or other reflective substrates that fool metering systems into under-exposing, resulting in a very dark image. You can have similar problems when photographing brightly coloured butterflies against a very dark background such as shown in the photo below.
You can use the camera’s exposure compensation control to correct this. If I had used a ‘straight’ automatically metered exposure for the photo of the Brimstone butterfly below, the meter would have been over-influenced by the bright subject, and would have resulted in a dark under-exposed photo. Using exposure compensation to increase the exposure by +1 stop has produced a perfectly balanced exposure capturing the luminescent quality of the lighting.
Making decisions about how much exposure compensation to use can be time consuming, so most cameras enable you to ‘bracket’ exposures automatically. This just means shooting a rapid series of images, typically a series of 3 shots, with the first shot ‘as suggested’ by the camera, followed by additional shots taken at ‘darker’ and ‘lighter’ settings. This provides you with a series of images from which you can later choose the best one.

Gonepteryx rhamni, with camera set to +1 stop exposure compensation – Adrian Hoskins
Natural lighting
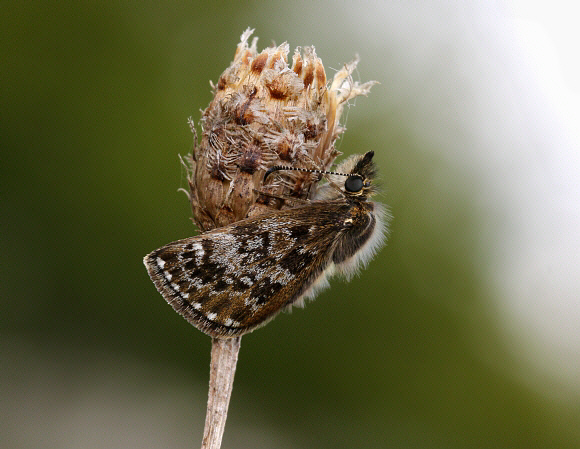
As any good photographer will tell you, the quality of the lighting is just as important as the subject and composition. Many people think that you can only photograph butterflies on bright sunny days but nothing could be further from the truth. In overcast conditions for example lighting will be flat, virtually shadow-less and ideal for bringing out the most delicate colours on a butterfly’s wings. The subtle hues of the subject and background in the image below could never have been captured in bright lighting conditions. The photo was taken at dusk, as the butterfly went to roost for the night.

Dingy Skipper Erynnis tages, male at roost on knapweed – Adrian Hoskins
Bright sunlight on the other hand will make the colours much more vivid, and give photos more visual impact. To bring out textures you need the light to be directional. You can use the low angle of early morning / late afternoon sunlight to accentuate the wing textures of species that bask on the ground. Similarly you can take advantage of the midday sun to bring out the textures of species that hold their wings erect when at rest, such as the Brimstone butterfly at the top of this page.
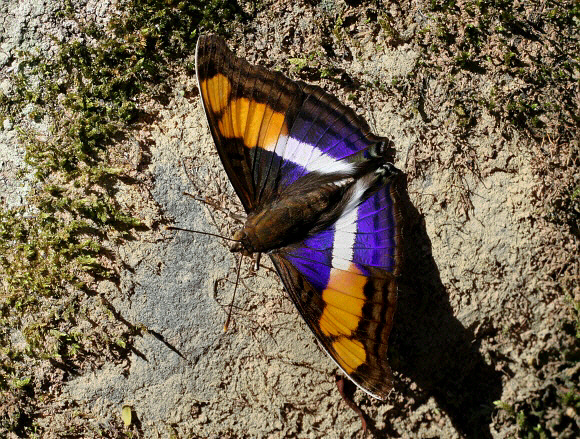
Some butterflies, e.g. Coppers, Metalmarks, Emperors and Morphos, have structural colours. This means that the colour varies according to the type of lighting, and the angle at which it hits the wing scales. An example is Doxocopa laure as illustrated below. Species with structural wing colours are best photographed under intense sun light. You can move around the butterfly and change your angle of view to see the effects of sunlight hitting the wings at various angles.

Doxocopa laure griseldis, male, Satipo, Peru – Adrian Hoskins
